I’ve been experimenting with using TWO as a timeline OSC record/edit/playback tool for Resolume, and have come quite a long way, but I’ve realized that by default, Resolume does not react well to having all the data it transmits being sent back from TWO verbatim.
Some messages are not meant to be received at the density they are sent. Others overlap, and while all are sent, only one should be received, etc.
I would love it if you wanted to test things out, to figure out what of the Resolume data should be filtered out in TWO and/or Resolume, so that they can work in unison!
I’ve put together a little video for this post, which you may find a good intro:
What you’ll be able to do with Resolume & TWO
- Remote-control Resolume.
- Save states for Resolume, and interpolate between saved states.
- Sequence these state changes on a timeline.
- Record all the OSC data that Resolume transmits, thus capturing a performance.
- Editing and playing back that performance.
- Sequencing changes of parameters in detail in TWO’s timeline. In interaction with the recorded performance data.
A combined set of features which are very timely with the video recording feature just introduced in Resolume!
Recording and playing back a performance with Resolume and TWO
Resolume has a rich OSC implementation, with the characteristic that it transmits all state, with the same namespaces that it reacts to. This is useful in combination with the automatic namespace building of TWO.
The below steps are as far as I have come, but are not a complete tutorial on making the TWO & Resolume integration work – for that I need your tips on what Resolume likes and doesn’t like to receive!
I’ve made the .TWO file created following those steps, available to download here (unzip and open in TWO).
Of course as we learn the steps below will be updated to reflect the best way to go. Once the integration is finished, I’ll upload a finalized file and make a nice tutorial to go with it.
Steps
In Resolume :
- In ->Preferences->OSC, ensure OSC Input and Output are both enabled.
In TWO:
- Create an OSC Network Location, setting the ports and IP’s to match the ones Resolume transmits to and from. Name it “Resolume”.
- In TWO’s Global Settings View, ensure the option ‘Global – Build Namespaces’ Is enabled.
- Already, you can record and edit the resolume data, just as in the oscHook example video. As you go, the namespace will be updated to reflect the data received.
- But, unlike oscHook, Resolume has a huge, complex namespace.
- To instead achieve detailed control, and do extensive editing of a Resolume performance, you need to split the huge global Resolume namespace, into sub-namespaces, each corresponding to a sub-section of Resolume.
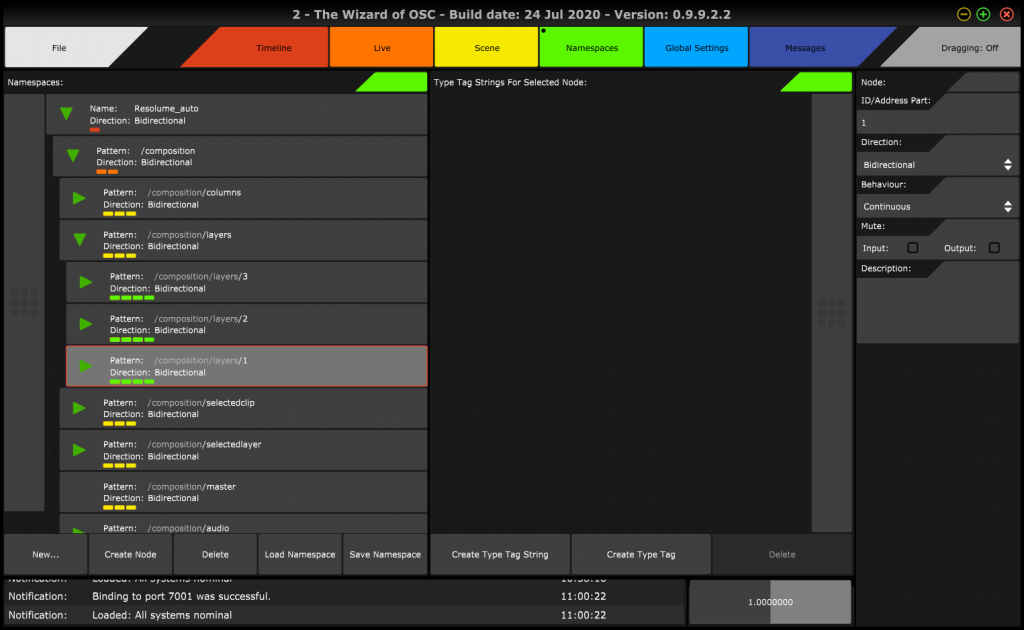
Above you see TWO with one huge OSC Namespace for Resolume. Below, the alternative, of separating the above to many dedicated sub-namespaces, used in an “Address” hierarchy in TWO.
- Load the composition in Resolume anew – this causes it to broadcast all of its OSC namespace.
The Namespace hierarchy appearing is as follows:
- /composition
- /composition/columns
- /composition/columns/n (1 – 9)
- /composition/columns/n/<>
- /composition/layers
- /composition/layers/n (1 – 3)
- /composition/layers/n/clips
- /composition/layers/n/clips/n (1-9)
- /composition/layers/n/clips/n/<>
- /composition/layers/n/video
- /composition/selectedclip
- /composition/selectedlayer
- /master/<>
- Etc.
There are at least 3 sub-classes of namespace for Resolume: For columns, Layers, and within those, Clips.
It is straight-forward to adapt to this hierarchy in TWO:
- In the Namespaces view, expand the Resolume_auto namespace to show /composition/columns/1.
- (You can if you like rename “Resolume_auto” to just “Resolume”).
- Right click the Node with pattern “/composition/columns/1”, and select “cut”.
- Collapse the “Resolume” tree.
- Right-click on the empty area in the Namespaces pane, and select “Paste”.
- Select the newly created Root Node, and rename it from “1” to “Column”.
- Ensure that in the Property Panel of if, the option “Build Namespace Automatically” is on.
- Delete the Node hierarchy /composition/columns within “Resolume”.
- Repeat the above steps for “/composition/layers/1”, naming the resulting namespace “Layer”, and deleting “composition/layers” within “Resolume”.
- From within the “Layer” you just created, repeat the process for “/clips/1”, creating “Clip”, and deleting the “clips” hierarchy under “Layer”.
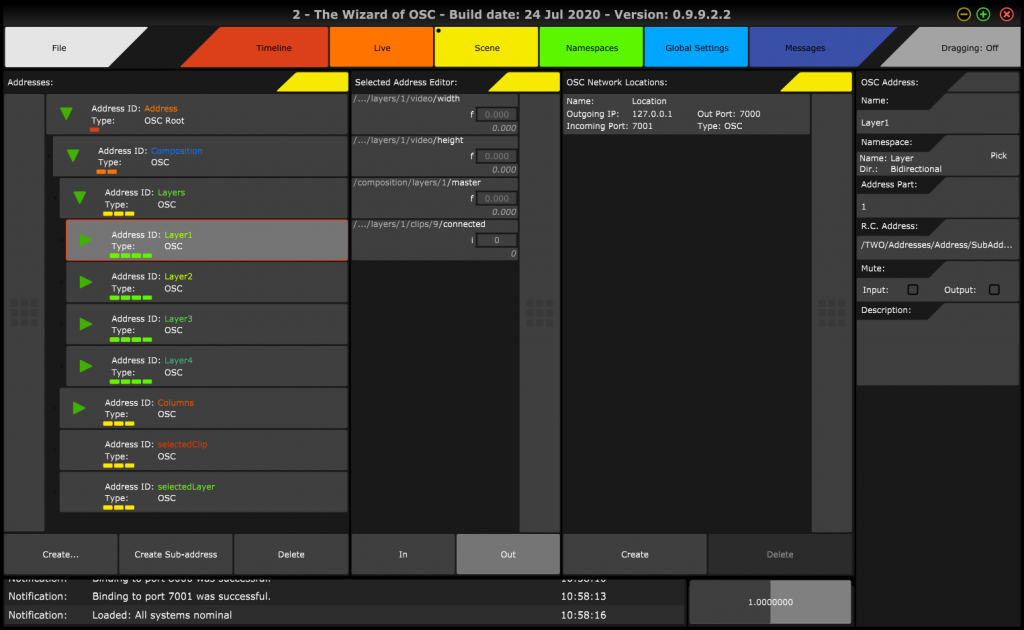
- Now, switch to the Scene view, and create a hierarchy of sub-addresser under the “Resolume” Address, as below:
- Resolume
- Composition
- Layers
- Layer1
- Clips
- Clip1- Clip9
- Temp
- Clips
- Layer1
- Columns
- Column1 – Column9
- SelectedClip
- SelectedLayer
- Layers
- Composition
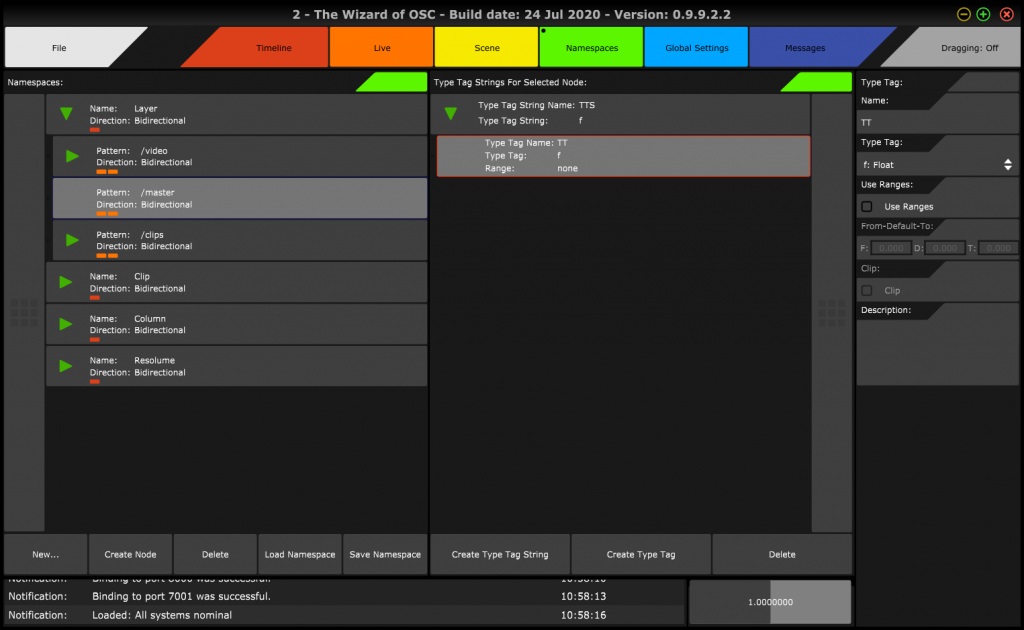
Address Resolume should have Namespace Resolume. Layer1 and selectedLayer should have Namespace Layer. Clip1 through Clip9, and selectedClip, should have Namespace Clip. Column1 through Column9, namespace Column. Composition, Layers, Clips, Columns, should all not have a Namespace assigned at all, they only serve for grouping.
- Right click on Layer1, select copy, then right click on Layers, and select paste. Repeat for the rest.
You now have a complete hierarchy you can reuse!
In TWO’s Live view, create a new Global Editor controller – you will see a column with controls for each Resolume sub-address, giving you a neat overview of all OSC parameters.
Depending on how you’ve set up Resolume’s OSC transmission, and how you intend to use it, you may wish to make these additional settings:
- Mute input and output on selectedClip, and selectedLayer – since they duplicate what happens in the respective clips and layers in the hierarchy.
- Potentially, also mute “/position” in namespace Layer, and “/transport/position” in Clip. Depending on how you use TWO with Resolume, you may or may not want these to be recorded/transmitted.
And, if at any time Resolume transmits a message which is not yet part of any namespace, TWO will automatically create a node for it in the most appropriate namespace from the ones you created, so no message is ever lost.
Save this file, as it will be your starting point for any new project you do with Resolume: this setup needs to be done only once, and given a completed file, you can just download it and use it without going through the above effort every time.
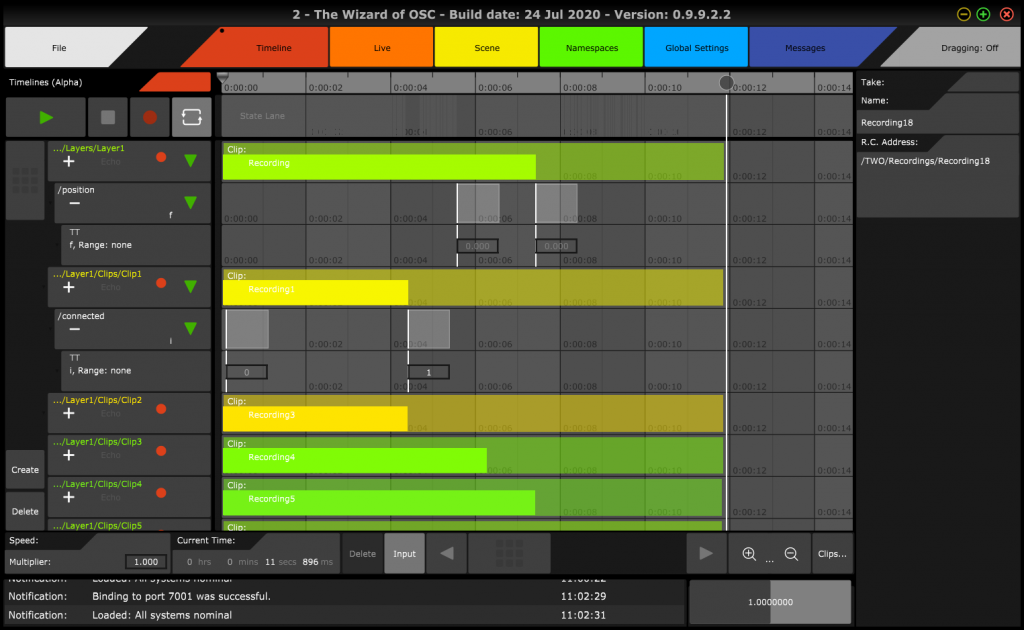
Finally, to add timelines for recording:
In TWO’s Timeline view, click “Create”, and in the appearing pop-up, select “Resolume”, and then click the “Recursive” button. That will add lanes for all addresses. You will see lanes created for all Addresses which have a Namespace assigned, ready to arm, and record clips into, separately!
If you do not want all, you can just add lanes separately for each Address tree separately – for example only the Layers hierarchy.
That is all for now, I hope you find this promising, and look forward to when Resolume and TWO integrate well together!